Ever pinned a to-do note to a corkboard? Simply put, Kanban is a virtual equivalent of the board so that you know what’s going on with your project.
Kanban board is a form of agile project management tool that helps visualize the workflow. Kanban table is our variation on a Kanban board. Just instead of dull sticky notes, here everything is right on the table, available for users to read, discuss & relish.
1. Creating Kanban tables
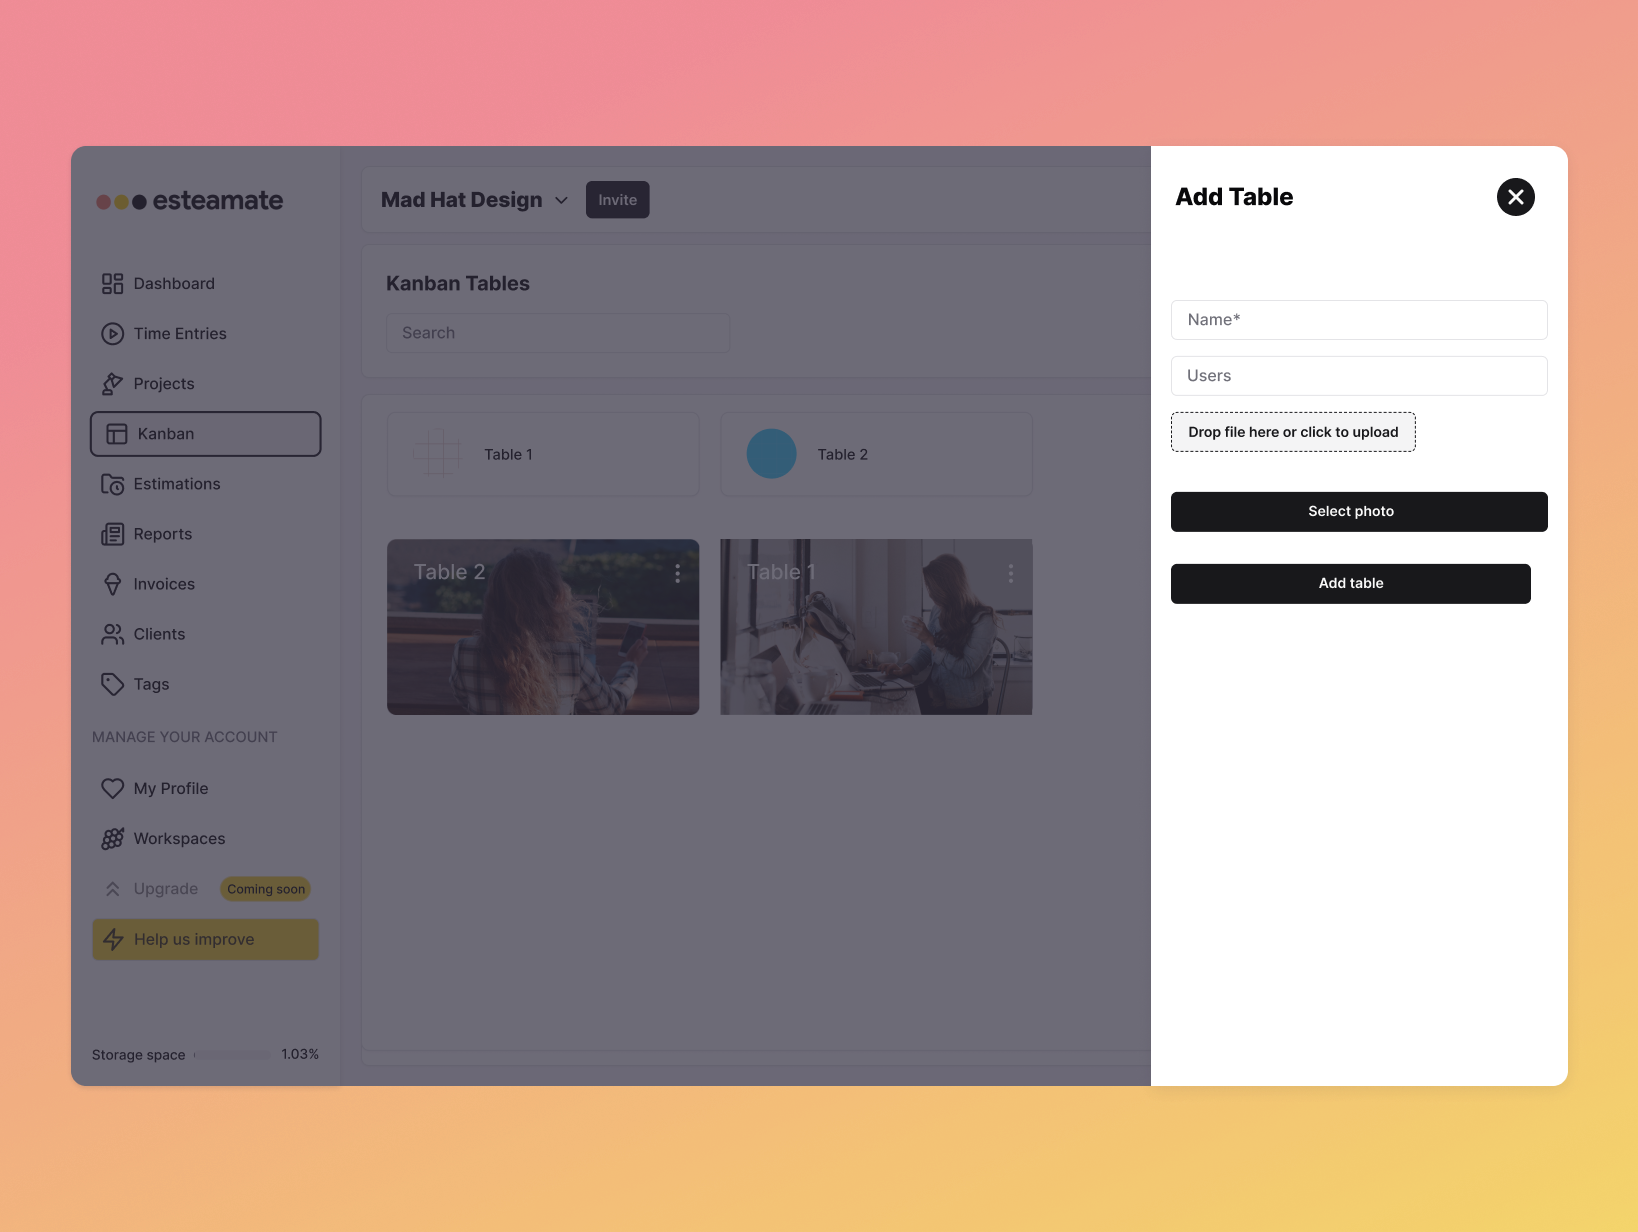
a. Go to Kanban and click ⊕ in the top right corner.
b. Name the table, choose the Users who you’ll share the workspace with, and add a background photo!
 Important tip
1. Add Columns
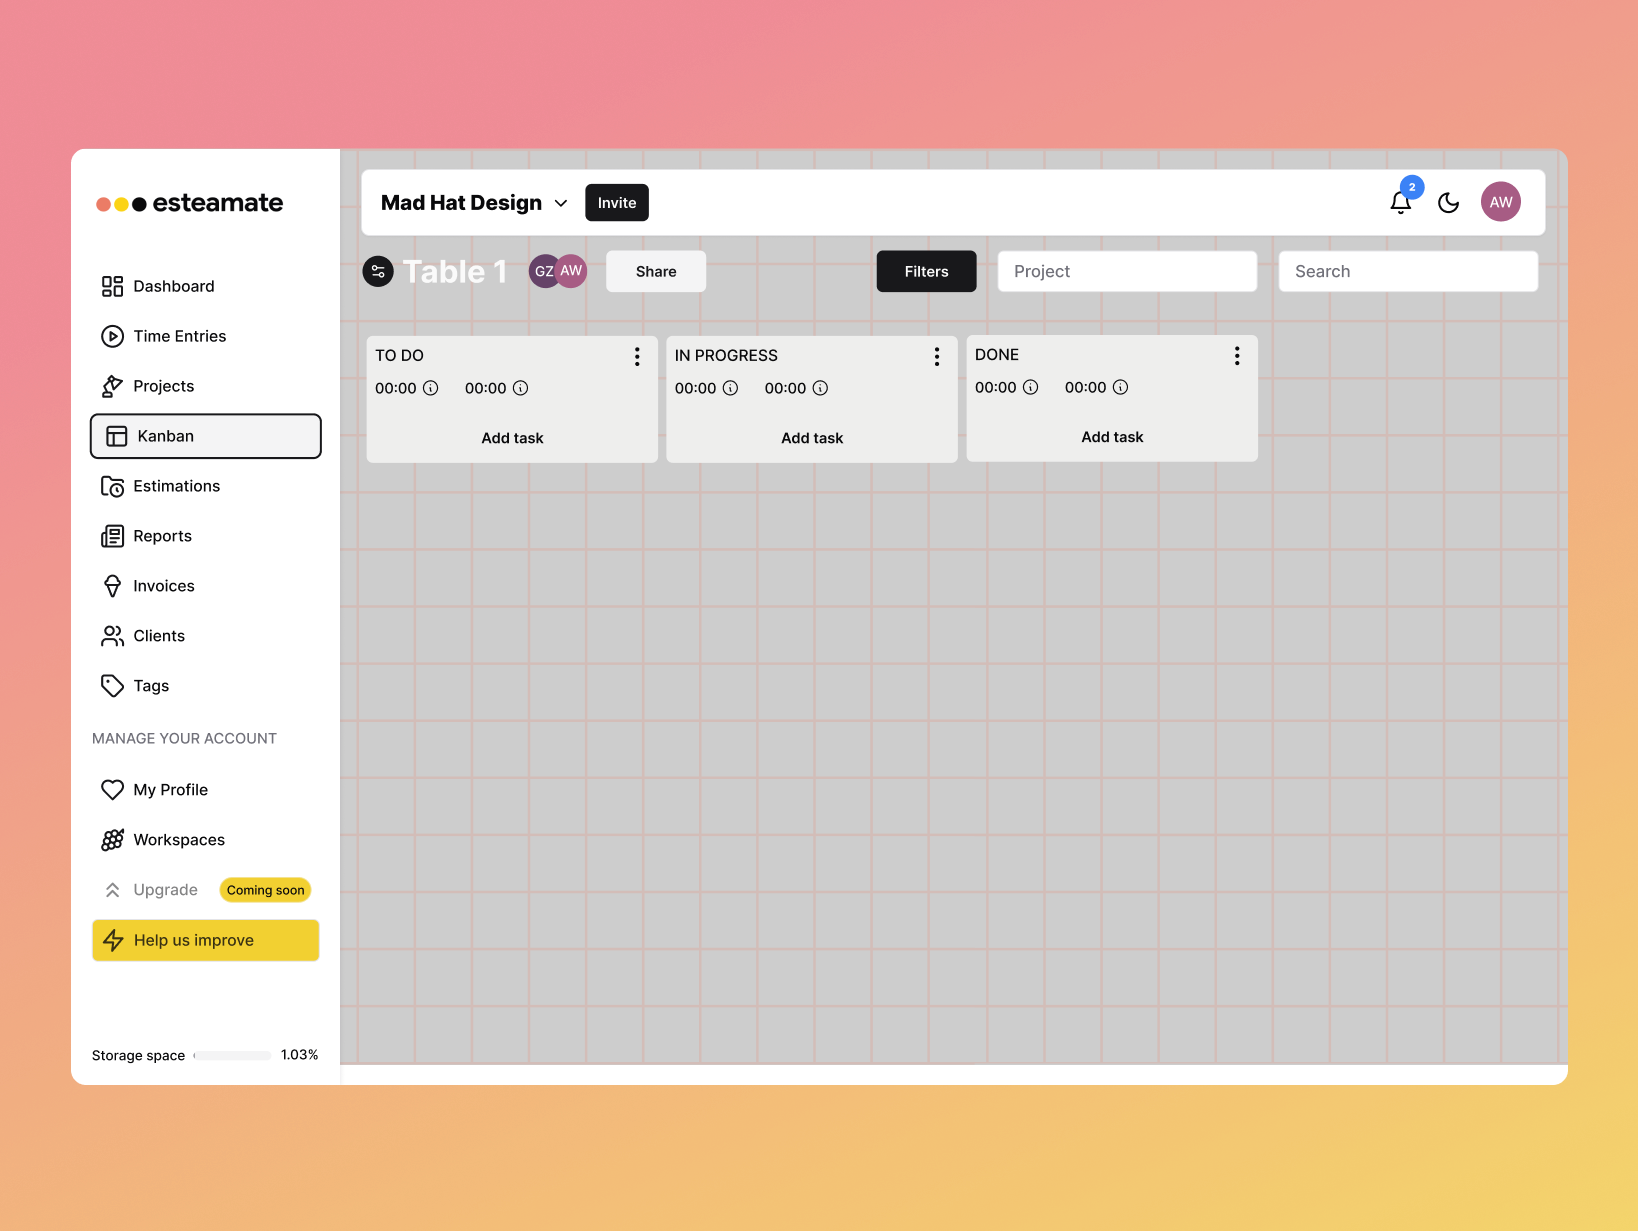
a. Columns are essential for the Kanban method. Each represents different stages of a work.
b. First, use an easy workflow. We recommend: To Do, In Progress, and Done. Think about stages specific to your job, like Client Review or Q&A.

2. Add Tasks
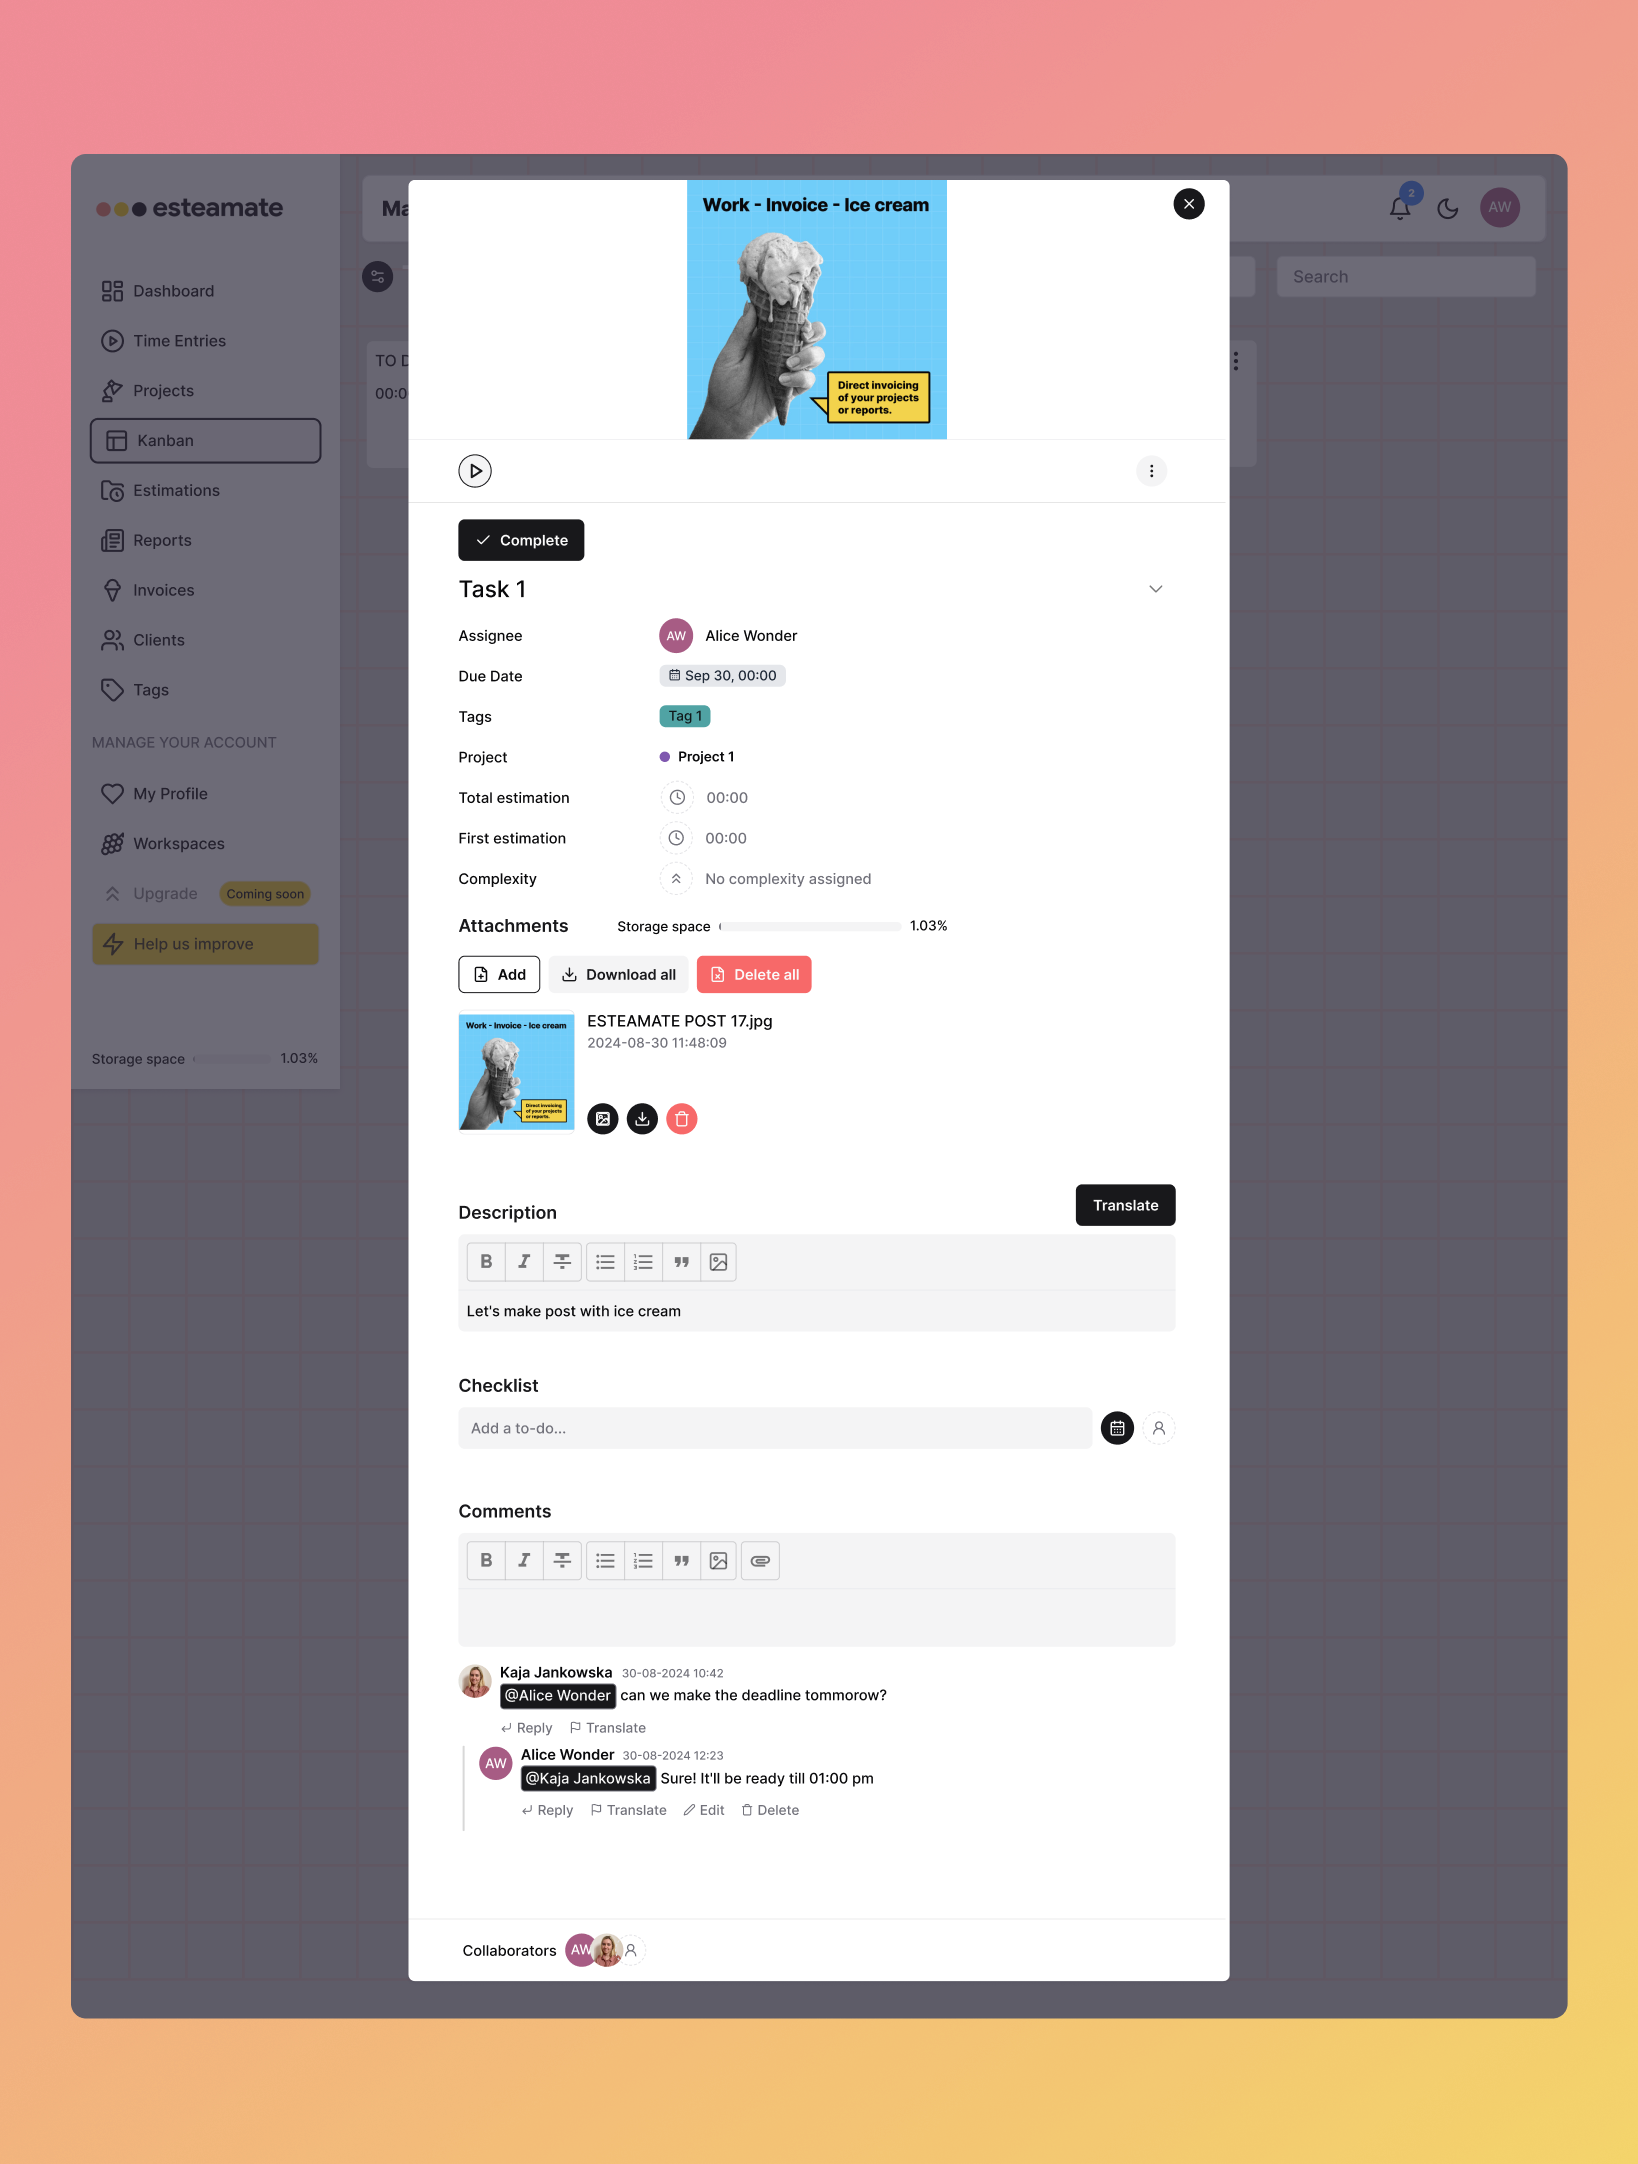
a. Click Add Task and fill in the name field, then confirm with a check mark. Then click on the task to complete the details.
3. In this window, we have several fields to complete.
a. Choose an Assignee responsible for the task.
b. If more people are going to work on it, add Collaborators.
c. Set a Due Date.
d. Assign the task to a Project.
e. You can also state the Complexity of the task.
f. Add First estimation - the initial estimated time to complete the task. For example, after this time your Client should receive a first version of his order.
g. Add Total estimation - taking additional activities such as amendments into account. Fill in the Description. This could be a brief you received from your client.Add optional information and files, such as Attachments, Checklist and Comments.

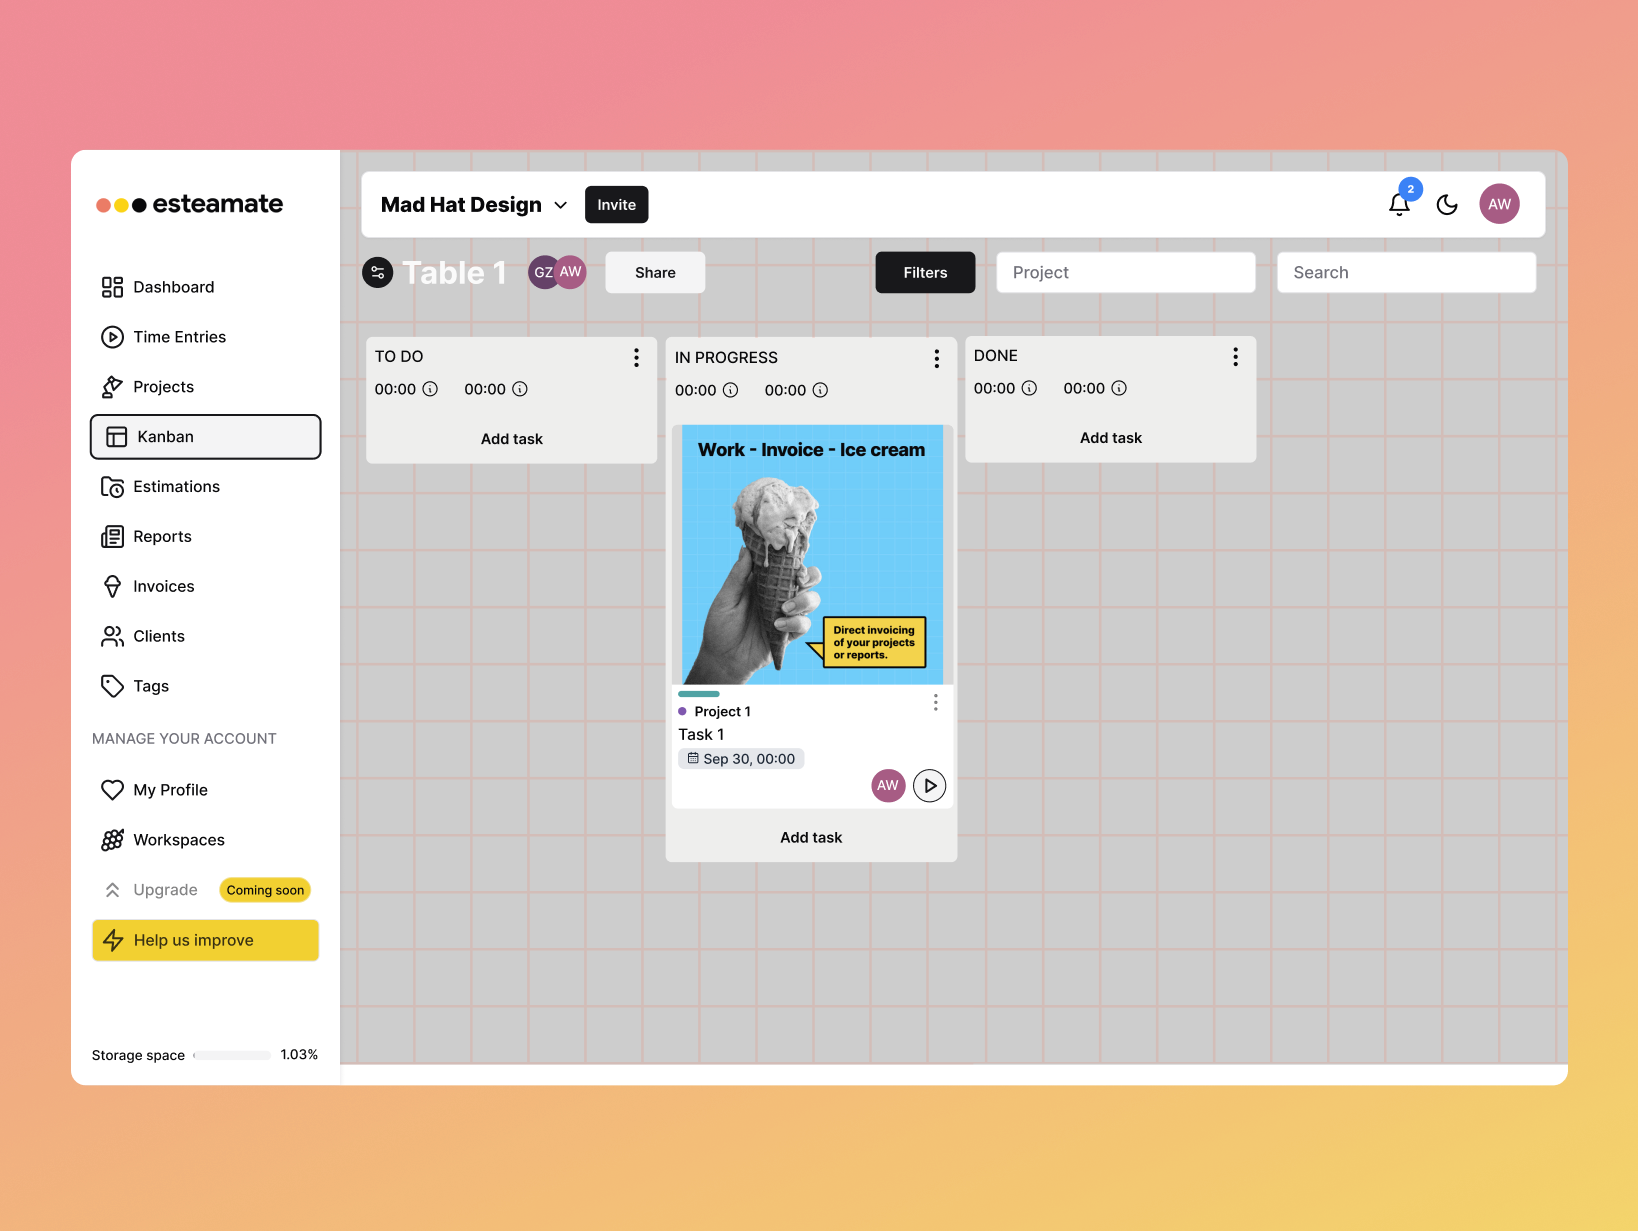
6. Now, pull the task to an appropriate column and press play to start working. Move it through stages until it lands in the final column.
7. If you don’t intend to return to this task, press Complete.
 Important tip